Medu Vadai(Ulundhu vadai)
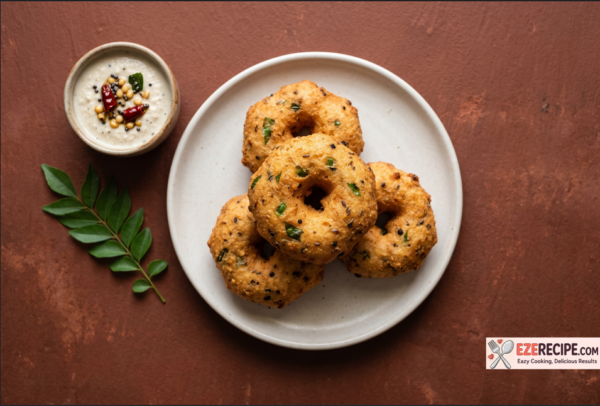
These crisp, golden medu vadas are incredibly light and fluffy on the inside. The secret is minimal water, an ice cube while grinding, and aerating the batter.
Getting medu vada right at home often feels like a gamble. Sometimes they soak up too much oil; other times, they turn out dense and heavy instead of light and fluffy. After plenty of trial and error, I’ve found that the secret to the perfect restaurant-style texture lies entirely in how you handle the batter.
The biggest mistake is adding too much water while grinding. You have to be patient, adding just drops at a time, and I always throw in an ice cube to keep the mixer from heating up the dal. Once it is ground to a slightly coarse paste, the real work begins: beating the batter.
Whipping air into the dal for just a few minutes completely transforms it. When a drop of batter floats in water, you know you are going to get a vada with a perfectly crisp exterior and a cloud-like interior. This version skips the sambar to focus purely on mastering the vada itself, keeping things straightforward so you get that perfect crunch every single time.
Instructions
- Drain all the water from the soaked urad dal using a fine strainer.
- Transfer the dal to a mixer grinder, adding the ice cube to prevent the blades from heating the batter.
- Grind the dal to a slightly coarse paste, adding the absolute minimum amount of water necessary.
- Transfer the ground paste to a wide mixing bowl and mix in the salt.
- Beat the batter vigorously with your hands or a whisk for 2 to 4 minutes, until it turns pale and fluffy.
- Drop a small portion of the batter into a bowl of water to test the aeration; it should float on the surface.
- Add the chopped ginger, green chillies, asafoetida, curry leaves, and coconut, then mix gently to combine.
- Shape the batter into rounds with a hole in the centre and deep fry in hot oil until the crust is crisp and evenly golden brown all over.
Notes
Always test the batter in a bowl of water before adding the mix-ins. If it sinks, beat it for another minute until it floats.
Keep the water to an absolute minimum while grinding. A loose batter will absorb extra oil during frying and be very difficult to shape.
Adding an ice cube during grinding is crucial because friction from the mixer heats up the dal, which ruins the fluffy texture.
If making the batter ahead of time, do not add the salt or mix-ins until right before frying, as salt draws out moisture and thins the batter.